

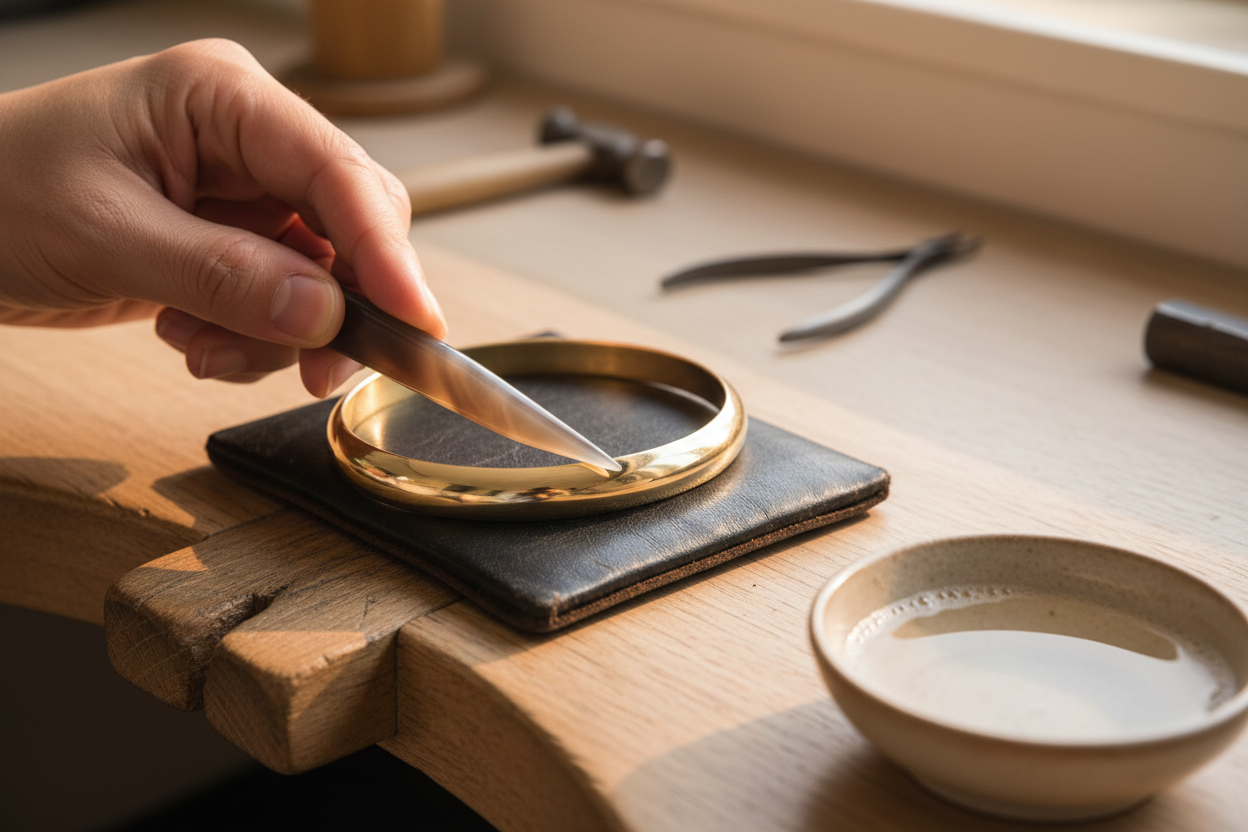
A professional workshop guide for jewelers covering tool selection, lubricant ratios, force control, annealing, and finishing — everything you need to achieve a consistent mirror-quality surface on gold and silver bangles.
Planishing is one of the most demanding finishing techniques in jewelry making. Unlike grinding or sanding — which remove material — planishing uses a hard, polished tool to physically compress and flatten microscopic surface irregularities, densifying the metal and producing a reflective, mirror-like finish. The result is not just visual: the cold-working process also increases surface hardness and wear resistance.
This guide covers the five core techniques demonstrated in professional bangle planishing, with detailed explanations of tool selection, lubricant preparation, motion control, annealing, and post-process finishing.
Technique 1: Choosing the Right Tool — Agate Burnisher vs. Tungsten Carbide Burnisher
Tool selection is the first and most consequential decision in planishing. The two primary tools used in professional workshops are the agate burnisher and the tungsten carbide burnisher. Each has distinct characteristics that make it suited to specific tasks.
| Dimension | Agate Burnisher | Tungsten Carbide Burnisher |
|---|---|---|
| Material | Natural or synthetic agate | Tungsten carbide alloy (extremely hard) |
| Surface finish produced | Warm, smooth, satin-bright | Extremely bright, high-reflectivity mirror finish |
| Ease of use | High — forgiving, low risk of marking the workpiece | Low — uneven pressure easily creates ridges or scratches |
| Best suited for | Bangle outer faces, large curved surfaces, initial planishing passes | Ring shanks, small details, stubborn scratch removal, final brightening |
| Drawbacks | Brittle — chips or cracks if dropped | Causes hand fatigue over long sessions; higher cost |
Practical rule: Use the agate burnisher for the majority of bangle work — its forgiving nature allows you to work quickly across large areas. Switch to the tungsten carbide burnisher only for detail areas or when you need the highest possible reflectivity on a small section.
Technique 2: The Lubricant — Diluted Dish Soap Solution
Dry planishing is never acceptable. Without lubrication, the burnisher drags across the metal surface, generating heat, tearing micro-layers, and leaving the workpiece dull or pitted. The standard lubricant used in professional workshops is a diluted dish soap solution.
Why dish soap?
Dish soap solution serves three functions simultaneously: it lubricates the tool-to-metal contact zone, suspends and carries away microscopic metal particles abraded during planishing, and provides a thin thermal buffer that reduces localized heat buildup.
Recommended ratio
Mix dish soap and water at a ratio of approximately 1:10 to 1:15 (one part soap to ten to fifteen parts water). This concentration provides sufficient lubrication without leaving excessive residue.
Too dilute (too much water): The solution evaporates or runs off the workpiece quickly, leaving the surface dry mid-pass. Dry planishing causes surface lifting and a dull result.
Too concentrated (too much soap): Excess surfactant leaves a thin hazy film on the metal surface after planishing. This reduces apparent brightness. The haze is removable — see Technique 4 — but it is better to use the correct ratio from the start.
Practical tip: When in doubt, err toward a slightly higher soap concentration. A hazy surface from excess soap is easily corrected; a dry, lifted surface is much harder to recover.
Technique 3: Motion, Pressure, and Contact Angle
Planishing technique is built on three mechanical principles: contact surface area, pressure magnitude, and stroke frequency. Getting all three right is what separates a professional result from a damaged workpiece.
Contact surface area
Whenever the geometry of the workpiece allows, use the broadest flat face of the burnisher in full contact with the metal. A larger contact area distributes pressure evenly, produces a flatter surface, and covers more area per stroke. When working on curved sections or recessed areas where full-face contact is impossible, tilt the tool to use its edge or tip — but return to full-face contact as soon as the geometry permits.
Pressure: quantity over force
The governing principle of planishing pressure is frequency over force. Gold is a soft metal. Applying heavy downward pressure does not accelerate the process — it creates depressions, ridges, and uneven surfaces that are difficult to correct. Instead, use light, consistent pressure with rapid, overlapping strokes. The cumulative effect of many light passes produces a flatter, brighter result than a few heavy ones.
Work-hardening and annealing — the critical cycle
As you planish, the metal undergoes work-hardening: repeated mechanical deformation causes the crystal structure to compress and lock, making the metal progressively harder and more resistant to further planishing. You will feel this as increasing resistance under the tool and notice that the surface stops improving despite continued effort.
The solution is annealing — heating the metal to restore its crystalline structure and return it to a soft, workable state.
Gold bangles: Anneal at least once during the planishing process. Heat evenly to a dull red glow, then allow to air cool or quench in water (depending on alloy). Resume planishing once the piece has cooled and been cleaned.
Silver bangles: Silver work-hardens more rapidly and more severely than gold. Plan for at least two annealing cycles during a full planishing session. Watch for the metal becoming noticeably stiffer under the tool as the signal to anneal.
Skipping annealing when the metal has work-hardened is the most common cause of poor planishing results. A properly annealed piece responds immediately to light pressure; an over-hardened piece resists the tool and produces an uneven surface regardless of technique.
Technique 4: Final Brightening — Steam Cleaning
After planishing is complete, the workpiece surface typically carries residual fingerprints, soap film, and microscopic metal particles. These contaminants reduce apparent brightness and can make an otherwise excellent surface look dull or hazy.
Primary method: steam cleaning
A jewelry steam cleaner delivers a focused jet of high-pressure steam that instantly removes surface contaminants without mechanical contact. This is the fastest and most effective method for restoring full mirror brightness after planishing. Direct the steam jet across the entire planished surface, paying particular attention to recessed areas where soap residue tends to accumulate.
Alternative method: boiling water rinse
If a steam cleaner is not available, submerge the workpiece in boiling water for 30 to 60 seconds, then remove and allow to air dry on a clean, lint-free surface. This method is less effective than steam for removing heavy soap residue but is adequate for light contamination.
If the planished surface appears hazy rather than mirror-bright, the cause is almost always excess soap residue or fingerprint oils. Steam cleaning or boiling water will resolve this in most cases. If haziness persists after cleaning, the surface may require an additional light planishing pass with fresh lubricant solution.
Technique 5: Tool Maintenance and Storage
The quality of a planished surface is directly limited by the condition of the burnisher face. A burnisher with even a single scratch on its working surface will transfer that scratch to every workpiece it touches — and those marks cannot be removed by further planishing with the same damaged tool.
Storage protocol
After each use, store burnishers individually, separated from all other tools. Never place an agate or tungsten carbide burnisher loose in a tool drawer or tray where it can contact other metal tools. Even a brief impact against a harder surface can chip an agate burnisher or score a tungsten carbide face.
Inspection before use
Before beginning any planishing session, inspect the working face of the burnisher under good lighting. Run your fingernail lightly across the face — any scratch or chip will be immediately detectable by touch. A damaged burnisher should be set aside for re-polishing or replacement before use.
Re-polishing
Minor surface marks on agate burnishers can sometimes be removed by re-polishing the face on a fine ceramic or leather strop charged with polishing compound. Tungsten carbide burnishers with significant surface damage generally require professional re-grinding.
The Complete Professional Workflow
- Inspect and prepare the workpiece. Ensure the bangle surface is clean and free of deep scratches that planishing cannot address. Planishing compresses surface irregularities — it cannot fill deep gouges.
- Prepare the lubricant solution. Mix dish soap and water at 1:10 to 1:15. Apply generously to the workpiece surface before beginning.
- Initial planishing with the agate burnisher. Using full-face contact and light, rapid strokes, work systematically across the entire outer surface of the bangle. Reapply lubricant frequently — the surface should always appear wet.
- Anneal when resistance increases. When the metal begins to feel stiff under the tool, stop, anneal, clean, and resume planishing.
- Detail work with the tungsten carbide burnisher (if required). Address any remaining dull spots, fine scratches, or recessed areas that the agate burnisher could not fully reach.
- Final anneal and clean (if required). Silver bangles typically require a second annealing cycle before the final planishing pass.
- Steam clean or boiling water rinse. Remove all surface residue to reveal the final mirror finish.
- Inspect and store tools. Check burnisher faces for damage before storing separately.
Summary: The Four Pillars of Professional Bangle Planishing
Fine details: tungsten carbide burnisher — maximum brightness, precise control.
Lubrication: dish soap solution at 1:10 to 1:15 — never planish dry.
Metal softness: anneal as needed — gold once minimum, silver twice minimum.
Mastering these four principles and the techniques that support them is what allows a skilled jeweler to produce consistent, mirror-quality bangle surfaces efficiently and without damaging the workpiece.
Workshop note: All annealing temperatures, quenching procedures, and tool specifications should be confirmed against the alloy supplier's recommendations for the specific gold or silver composition being worked. The techniques described here reflect common professional practice and may require adjustment for non-standard alloys or workpiece geometries.

0 comments