

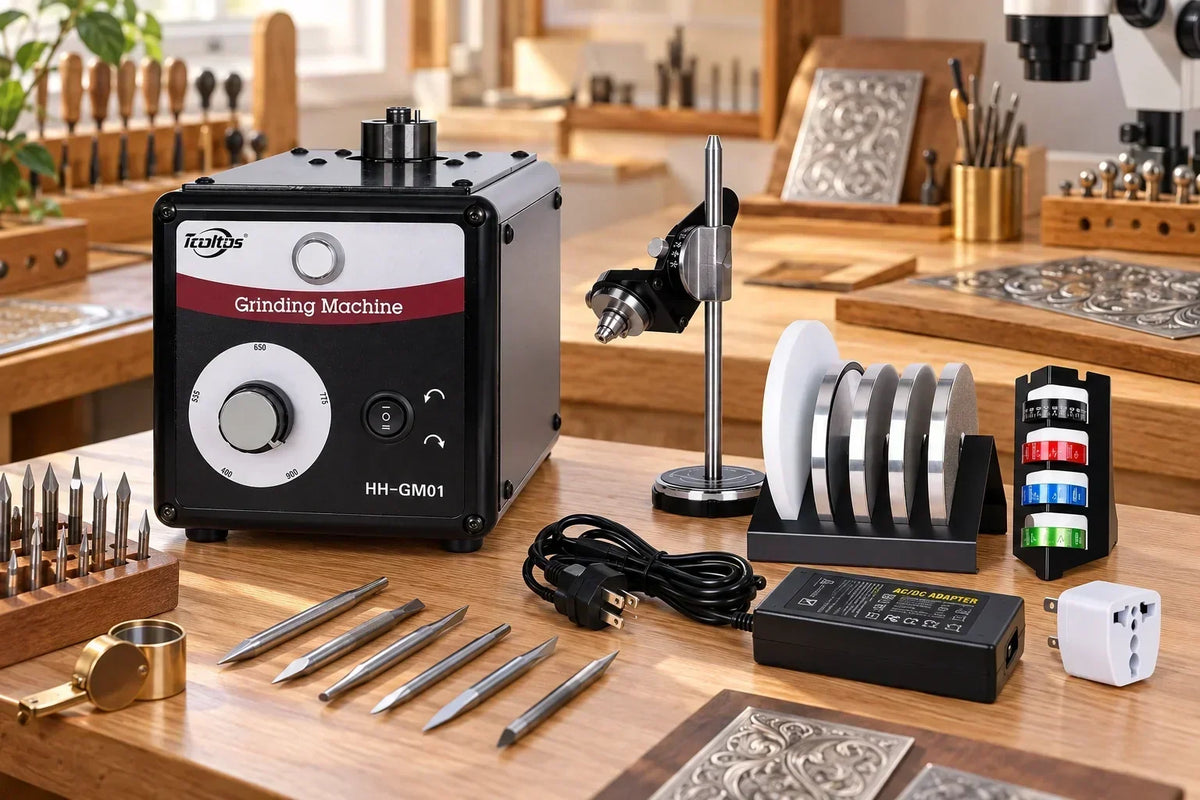
An engraving system is only as consistent as the cutting tools behind it. A dedicated knife grinding machine is not an engraving motor; it is a station for creating and maintaining repeatable cutting geometry on compatible gravers and cutters. It becomes worthwhile when a bench sharpens enough tools that hand-only shaping makes angles and edge finish difficult to repeat.
Start With the Tools You Need to Sharpen
Confirm the tool materials and profiles in your normal workflow before choosing a machine. The Tooltos Multi-Angle Engraving Knife Grinding Machine HH-GM01 is listed for:
- Tool materials: HSS and carbide engraving tools
- Tool shapes: polygonal, semi-circular and reverse-taper
That does not mean every cutter should be clamped and ground the same way. Record the profiles your engraving, stone-setting or precision-metalwork tasks actually require, then plan fixtures, angle settings and wheel progression around those tools.
Repeatable Angles Matter More Than a Long Feature List
The HH-GM01 uses a QC template fixture with adjustable elevation and a degree ring. It supports:
- Preset 90°, 105° and 120° settings
- Custom angles
Repeatable geometry helps an operator return to a known tool profile after touch-up or reshaping instead of guessing by eye each time.
Choose an angle system that you can understand, record and repeat. A machine with custom-angle capability is useful only when the operator can document the selected geometry and check the finished edge before cutting valuable work.
Use the Three Wheels as a Sequence
The HH-GM01 includes 260, 600 and 1200 grit diamond wheels, each with its own role:
| 260 grit (coarse) | Rough shaping or a damaged edge |
| 600 grit | Refines the geometry |
| 1200 grit | Fine finishing |
Moving directly from a damaged edge to a fine wheel wastes time and can make it harder to restore a consistent shape.
Use the least aggressive step that will accomplish the task. Once the intended geometry is established, move through the finer stages deliberately and inspect the edge between stages. Replace or maintain consumable components according to their condition and the supplied instructions.
Match Speed and Direction to the Operation
The machine has adjustable 400–900 RPM speed and forward/reverse rotation. These controls help the user set a deliberate grinding approach for a compatible tool and fixture, but they do not remove the need for light pressure and controlled positioning.
Setting Up a New Profile
- Begin with a practice tool when setting up a new profile.
- Make small adjustments and stop to inspect the edge.
- Keep hands, loose clothing and other objects clear of the rotating wheel.
- Follow the supplied safety instructions for the machine and wheel system.
Plan a Sharpening Station, Not Just a Purchase
The machine measures 510 × 510 × 510 mm (about 20.1 × 20.1 × 20.1 in) and has a listed packing weight of 12.3 kg (about 27.1 lb). Give it:
- A stable, level work surface with task lighting
- Storage for fixtures and wheels
- Enough clear space for safe tool handling
Keep cutting tools labeled by profile and material so that a finished graver is not returned to the bench as an unknown edge.
This separation is useful in a professional workflow: grinding and inspection happen at the sharpening station, while engraving happens at the vise or workholding bench.
A Quick Buying Check
Choose a Dedicated Multi-Angle Grinding Station When You
- Routinely sharpen compatible HSS or carbide engraving tools
- Need to repeat known face or point angles
- Can support a disciplined inspection process
It Is Less Appropriate If Your Work
- Uses only occasional disposable cutters
- Depends mainly on custom freehand engraving geometry
Use a Controlled Sequence
- Identify the tool profile.
- Set the fixture.
- Use the right wheel stage.
- Inspect the edge.
- Record the geometry for the next sharpening cycle.
Support
Have questions about tool compatibility, angle setup or choosing the right grinding machine for your bench? Contact our team at sales@tooltos.com and we will be glad to help.
0 comments