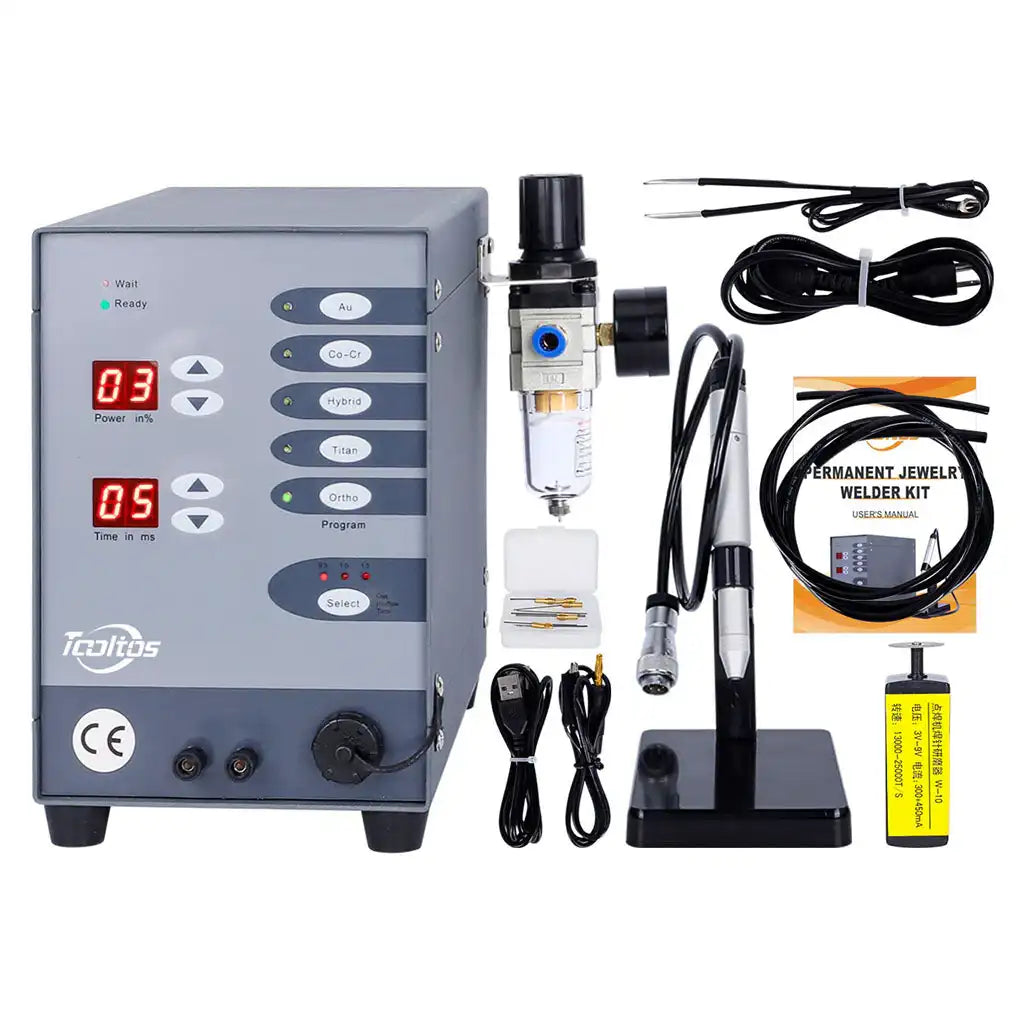
The Tooltos Automatic CNC Jewelry Spot Welder is a high-precision spot welding machine designed for permanent jewelry welding, ring resizing, chain repair, and joining precious metals like gold, silver, and titanium. As one of the best jewelry spot welders for beginners and professionals alike, this automatic CNC device delivers clean, strong welds—when used with the right setup, parameters, and technique.
1. Setup & Argon Configuration
Getting your Tooltos Automatic CNC Jewelry Spot Welder up and running correctly is the first step to avoiding common issues like oxidation or weak welds.
Q1: How to connect the air hoses?
The Tooltos Automatic CNC Jewelry Spot Welder comes with two different-sized air hoses:
- Inlet (Large Hose): Connect from your argon regulator directly to the filter's inlet port.
- Outlet (Small Black Hose): Attach from the filter's outlet to the machine's front gas port (located next to the welding handle).
Push each hose firmly until you hear a "click" to lock it in place. Leaks can lead to black, oxidized welds.
Q2: Do I need argon?
While the machine can operate without argon, argon is mandatory for professional, oxidation-free results—especially for permanent jewelry welding or precious metal spot welding.
- Without argon: Molten metal reacts with oxygen instantly, leaving black, rough welds that require heavy polishing or acid cleaning.
- With argon: Argon gas shields the weld pool from oxygen, producing bright, smooth welds ideal for gold, silver, and titanium jewelry.
For best results, use 100% pure argon (not an Argon/CO2 mix).
Q3: What argon pressure setting?
Recommended: 0.1–0.2 MPa (1–2 bar).
- Too low (below 0.1 MPa): Insufficient gas coverage leads to oxidation.
- Too high (above 0.2 MPa): Gas blows molten metal away, causing pits or uneven welds.
2. Welding Quality Tips: Fix Black Welds, Pits & Weak Bonds
Q4: Why are my welds black? How to fix black welds?
Check these three things:
- Argon purity: Use 100% pure argon (avoid mixed gases).
- Pre-flow timing: Ensure argon flows before the arc ignites—this primes the weld area to block oxygen.
- Tungsten needle extension: The tungsten should extend 3–5 mm beyond the ceramic nozzle. If it's too long, gas can't fully cover the arc, leading to oxidation.
Q5: Why does metal "explode" or melt through?
You're using too much energy. For thin chains or small prongs, use Power 2–4 and Time 4–6 ms. Weld in multiple low-power pulses instead of one strong burst.
Q6: How to get strong welds? Why won't metal fuse?
- Clean the metal: Wipe with alcohol before welding to remove oils and oxidation.
- Target the joint: The tungsten needle must touch the exact spot where the two metals meet.
- Adjust power for silver: Silver dissipates heat quickly, so use a higher power setting (4–6) than you would for gold.
3. Troubleshooting: No Spark, Sticking Needles & More
Q7: Not sparking—what's the solution?
If pressing the pedal produces no spark, the circuit isn't closed. Follow this checklist:
- Ensure the machine displays "Ready" (not "Wait" or "Charging").
- The black ground clamp must be securely attached to the workpiece—loose clamps break the current loop.
- Touch the tungsten needle to the metal before stepping on the pedal.
Correct sequence: Tungsten touches metal → Step pedal → Arc fires.
Q8: How to fix tungsten needle sticking to jewelry?
- Sharpen the needle: Use the included USB grinder to sharpen it to a pencil point.
- Lighten pressure: Touch the needle gently to the workpiece—don't press down hard.
- Reduce time: Shorten the welding time by 1–2 ms to avoid overheating the needle.
Q9: Is it normal to feel a tingling sensation?
The machine uses high-voltage micro-pulses, so a mild tingle is common if you hold metal directly. Use the included welding tweezers or insulated pliers to hold workpieces.
4. Parameter Settings (Professional Tuning)
Q10: How do Power and Time work?
- Power (02–10): Controls current intensity and weld depth. Use lower power (2–4) for thin metals (0.3–0.5 mm) and higher power (5–7) for thick rings or stainless steel.
- Time (4–30 ms): Regulates heat duration and weld size. Short times (4–6 ms) are ideal for delicate work; longer times (7–10 ms) work for cobalt-chromium alloy welding or mold repair.
Golden Rule: Thin items = Low Power + Short Time; Thick/High-Melting Metals = Higher Power + Moderate Time.
Q11: Are the Au/Ag/Ti presets automatic?
No—these are starting points, not one-size-fits-all settings. For example:
- 18K Gold (0.3 mm): Au mode + Power 2 + Time 5 ms.
- Pure Silver (0.5 mm): Ag mode (Hybrid preset) + Power 3 + Time 6 ms.
- Titanium (0.8 mm): Ti mode + Power 5 + Time 7 ms.
Always test parameters on scrap metal before welding your final piece.
Q12: Beginner-friendly universal settings?
- Power: 02–04
- Time: 04–06 ms
- Argon Pressure: 0.15 MPa
Test on scrap metal, then increase power incrementally until the weld is strong but not overdone.
5. Tungsten Needle Maintenance & Welder Care
Q13: Can I use sewing needles instead of tungsten?
Absolutely not. The machine requires 1.0 mm or 1.5 mm tungsten electrodes (included in the kit). Sewing needles will melt instantly, ruining your weld and potentially damaging the machine.
Q14: When to sharpen tungsten needle?
Sharpen your tungsten needle whenever:
- The tip turns black or has metal residue buildup.
- The tip becomes rounded (causes unstable arcs).
- The arc "dances" instead of focusing on the weld joint.
Use the included USB grinder to sharpen it to a 30–45 degree pencil point.
Q15: How to handle overheating?
- Keep the machine powered on but idle for 10–15 minutes (fans will cool it down).
- Avoid continuous welding for more than 5 minutes at a time.
- Ensure the machine is placed in a well-ventilated area.
Final Tips
- Black welds → Check argon flow, purity, or tungsten extension.
- No spark → Verify the ground clamp and "Ready" status.
- Sticking needle → Sharpen it and reduce welding time.
- Weak welds → Clean the metal, target the joint, and adjust power.
Ready to take your jewelry welding to the next level? Grab your Tooltos Automatic CNC Jewelry Spot Welder and start practicing—mastery comes with consistent use!
Shop Tooltos Spot Welders
Choose the right model for your workshop:
0 comments