

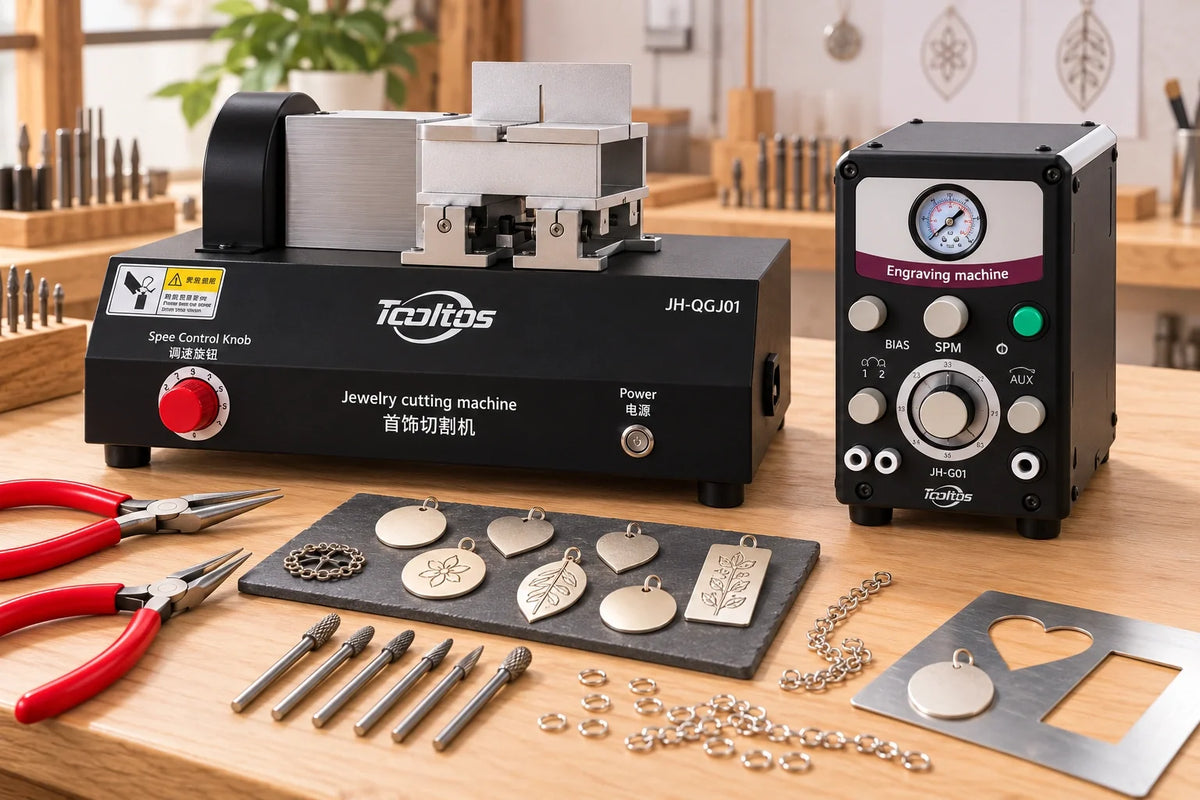
A pendant often needs more than one process: cutting the metal to shape, adding a line or texture, and refining the edge before assembly. Trying to make one machine perform every step can lead to a slower workflow and inconsistent results. A better bench plan gives cutting and engraving distinct roles, then reserves finishing for the final surface decision.
The workflow at a glance
- 01Cut the metal to establish the pendant form.
- 02Add engraved lines, texture, or decorative detail.
- 03Inspect the edges and surface.
- 04Finish selectively to preserve the intended design.
The Tooltos equipment below is not laser equipment. If a design specifically requires laser marking or laser cutting, confirm the required machine type, material capability, safety setup, and operating requirements before purchasing. The workflow here applies to mechanical precision cutting and pneumatic handpiece engraving.
Start with a clean, controlled cut
 For cutting small metal pendant parts, the Tooltos Precision Jewelry Cutting Engraving Machine is designed for precision cutting and engraving preparation on gold, silver, platinum, palladium, and alloys. Its variable 950–5200RPM speed, adjustable work platform, and stated cutting accuracy help a bench jeweler set up controlled cuts before decorative work begins.
Establish the shape before adding detail
Use the cutting stage to establish the pendant outline, slots, or other required metal geometry. Secure the workpiece, choose an appropriate speed for the metal and cut, and inspect the edge before moving to the next process. The machine operates on 220V 50Hz, so workshop power compatibility should be confirmed in advance.
Cutting setup checkpoints
- Confirm compatibility with 220V 50Hz workshop power.
- Secure the pendant blank and select an appropriate cutting speed.
- Inspect the cut edge before engraving begins.
Add detail with a dedicated engraving setup
 The Tooltos 8000RPM Pneumatic Jewelry Engraving Machine is for controlled handpiece work such as decorative lines, texture, bead-edge detail, and stone-setting preparation. Its dual handpieces and foot pedal support switching between prepared tools without constantly reconfiguring the bench.
Lay out the design and test the cut
Engraving is most controllable after the pendant shape is already established. Mark or lay out the design first, support the pendant securely, and make test cuts on suitable scrap before working on a finished piece. This pneumatic machine requires an external air compressor; Tooltos specifies 0.15–0.25MPa working pressure and recommends clean, dry air. The compressor is not included.
Plan the air supply before purchase
Allow for an external compressor, clean and dry air, and the specified 0.15–0.25MPa working pressure. The compressor is not included.
Keep cutting, engraving, and finishing as separate decisions
A clean cut does not automatically mean a finished edge, and engraved detail should not be softened by an unsuitable final polish. After cutting and engraving, inspect the pendant for burrs, sharp corners, uneven texture, and unwanted tool marks. Choose the finishing approach according to the intended result: preserve crisp engraved lines, soften only a specific edge, or create an even surface before assembly.
Inspect first and polish selectively
Work through a short sequence: establish the form, add the detail, inspect the surface, then finish only what supports the design. This reduces the risk of doing a full high-shine polish that removes the contrast or texture you deliberately created.
Before final finishing
- Check for burrs and sharp corners.
- Identify unwanted tool marks or uneven texture.
- Decide which engraved lines and textures must remain crisp.
Choose the next tool by the stage of work
Use a precision cutting machine when the pendant needs repeatable geometry. Use a pneumatic engraving machine when the work calls for hand-controlled decorative detail. For surface refinement after these steps, review the Tooltos polishing and finishing equipment collection and choose a method that suits the metal, shape, and intended surface.
| Stage | Main purpose | Key decision |
|---|---|---|
| Precision cutting | Establish the outline, slots, and metal geometry. | Workpiece support, suitable speed, and power compatibility. |
| Pneumatic engraving | Add hand-controlled lines, texture, and decorative detail. | Design layout, test cuts, secure support, and external air supply. |
| Finishing | Refine edges and surfaces before assembly. | Choose a method that preserves the intended lines and texture. |
Contact Tooltos
For product inquiries, contact us at sales@tooltos.com.
0 comments