

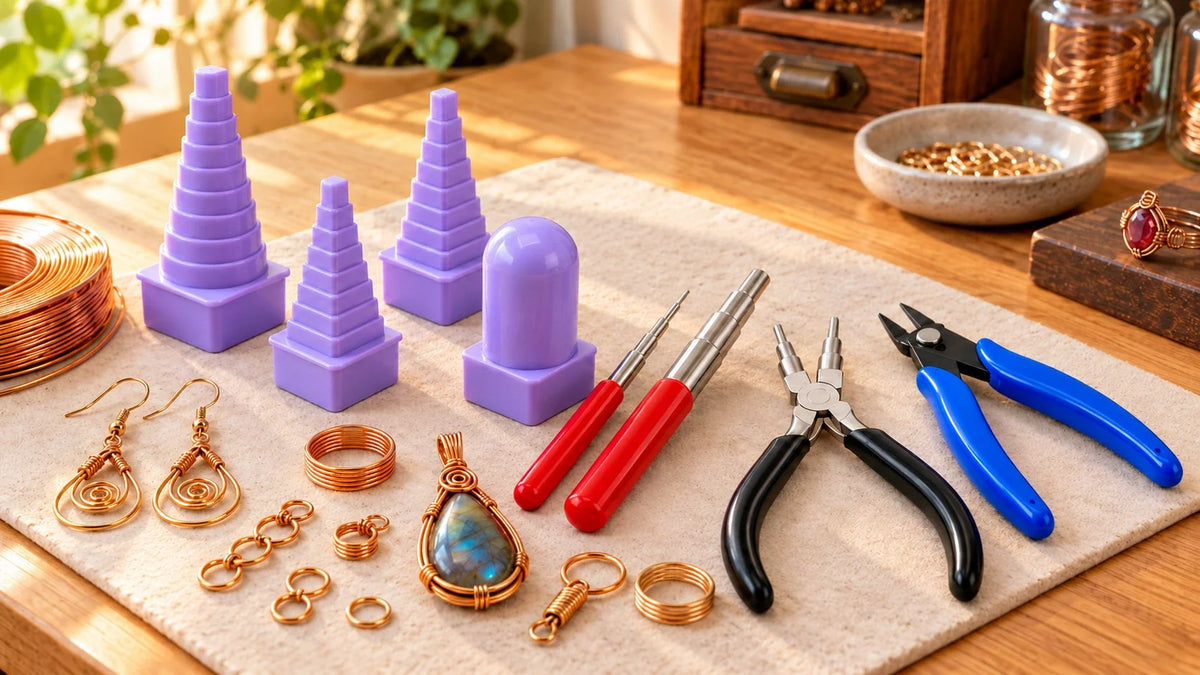
Wire wrapping and wire weaving can begin with a few simple tools, but the early results usually depend on one thing: whether repeated shapes actually match. A pendant can tolerate an intentionally irregular detail. A pair of earrings, a wrapped stone frame, or a chain of links looks much cleaner when its loops, coils, and bails are consistent.
This guide focuses on the forming stage. It does not replace practice with wire tension, but it helps a new maker choose tools that make repeatable geometry easier to achieve.
The Short Answer
Choose a fixed forming reference, test the fit, and repeat the same sequence. Consistent loops begin before the final cut.
Give Coils and Loops a Fixed Reference
Forming freehand is useful for an organic style, yet it makes it difficult to reproduce the same diameter on the next component. A mandrel creates a fixed reference: wrap compatible wire around the same step or profile, then remove the coil before trimming or refining it.
The Jewelry Wire Forming Kit with Mandrels Pliers and Cutter combines winding towers, stepped metal mandrels, forming pliers, and a cutter. It is useful when a project needs basic coils, looped links, spirals, jump rings, or repeated wire shapes.

Make one test coil first. Choose the mandrel section before you begin. That small check is faster than remaking a complete pair after discovering that the diameter is wrong.
Use the kit on compatible soft jewelry or craft wire. It is not intended for thick hardened steel wire or heavy-duty cutting. Wire diameter and hardness still affect spring-back, so a shape that works in soft copper may need a different approach in a harder material.
Make the Bail a Deliberate Part of the Design
A bail is more than the loop that lets a pendant hang. Its inside diameter needs to accept the chain or cord, and its outside proportion needs to suit the pendant. When bails are made by eye, the loop may be too small for the intended chain or visibly different between matching pieces.
For repeated loop sizes, select the Wire Bending Pliers option in Tooltos Wire Bending Cutting Pliers.
Six Round Forming Sections
3 / 4 / 6 / 8 / 9 / 10 mm
A starting diameter, not a guarantee of the finished opening. Check the actual bail against your chain or cord after forming, particularly when changing wire material or hardness.
Check your selection: The cutting pliers and end nipper are separate selectable tools, not automatically included together. The cutter already included in the wire-forming kit can handle compatible soft wire.
Pick the loop size from the chain or cord you plan to use, rather than choosing it after the pendant is finished. Wrap smoothly, leave enough tail to secure the form, and make the final cut only after checking the loop direction and fit.
Before Assembly
If a cut end will sit against skin or another component, inspect it closely and refine it with the appropriate finishing method. Wear eye protection when cutting wire and keep fingers clear of the cutting edges.
Work in a Repeatable Sequence
For a simple wrapped component, separate the design decisions from last-minute adjustments:
- Set the reference. Decide the wire gauge, metal, and the diameter of every repeated feature.
- Form the shapes. Make matching coils or loops on the selected mandrel.
- Wrap and check. Build with controlled tension, then check alignment before making the final cut.
- Finish last. Refine the ends after the component has passed its fit and symmetry check.
Matching Earrings Checkpoint
Compare both components at the forming stage rather than waiting until one piece is fully wrapped. Check these features side by side, then continue with the same sequence on each piece:
- Loop diameter
- Loop direction
- Tail length
This sequence makes it easier to identify whether an uneven result came from wire tension, the selected forming diameter, or the assembly step.
Select Tools by the Shape You Need to Repeat
| What You Need to Repeat | Tool to Consider |
|---|---|
| Coils, rings, spirals, and formed wire elements | A mandrel-based wire forming kit |
| Consistent round loops and pendant bails | Bail-making pliers |
For other hand tools used in wire projects, browse the Tooltos wire wrapping and beading collection and select each tool for its specific forming, holding, or cutting role.
Cleaner wire wrapped jewelry starts with a repeatable reference, not a larger tool collection. Test the shape, confirm the fit, and keep the forming sequence consistent before committing to the final cut.
Contact Tooltos
Need help choosing wire forming tools for your jewelry projects? Contact the Tooltos team at sales@tooltos.com. Share your wire material, diameter, and the shapes you want to make so we can help you select suitable tools.
0 comentarios